Создаем бота в Telegram без программирования. Пошаговая инструкция (Часть 1)
С момента создания Telegram прошло немногим более 5-ти лет...
И с каждым днем данная система общения набирает все большую и большую популярность. Telegram представляет собой нечто среднее между мессенджером и социальной сетью. В нем можно общаться, как в Skype, а также вести каналы, как в Instagram, например.
Каналы в Telegram, как и в любой социальной сети, можно монетизировать при определенных условиях, одним из которых является большое количество подписчиков. А подписчики, в свою очередь, гарантированы вашему каналу при наличии популярного и интересного контента.
Если в социальных сетях контент в группах создается вручную, то Telegramв этом вопросе на шаг впереди. Поскольку всю работу, связанную с поиском информации и ее публикацией на канале, можно переложить на бота. И что самое главное, вы можете создать его самостоятельно, бесплатно! При этом, вам даже не потребуются какие-то навыки программирования.
В этой инструкции мы расскажем вам, как быстро, просто и легко создается бот, выполняющий публикации новостей на канале в Telegram. И даже если вы только вчера включили компьютер, вы – справитесь! Ведь мы сопроводили инструкцию скриншотами.
Навигация:
Шаг 1. Воспользуемся помощью существующего бота.
Шаг 2. Создаем бота с помощью команды.
Шаг 3. Настраиваем созданного бота.
Шаг 4. Поручаем боту администрирование канала.
Шаг 5. Обучаем бота выполнению задачи (Доступно во второй части статьи)
Шаг 1. Воспользуемся помощью существующего бота.
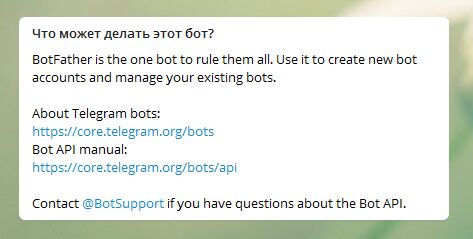
Необходимый нам бот находится вот по этому адресу - http://telegram.me/BotFather. Нажмите на ссылку. Откроется окно браузера. И вы увидите следующую картину.

Нажимаете на кнопку «Открыть ссылку». Откроется Telegram. В диалоговом окне вы увидите следующее сообщение.
Еще один вариант. Вводите адрес бота в том виде, в каком он показан выше в строке поиска в самом Telegram. На скриншоте показано, какой именно результат поиска следует выбрать.
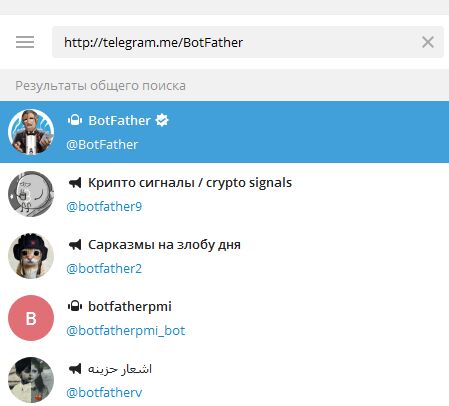
Осуществив выбор, вы увидите то же, что показано на втором скриншоте.
Шаг 2. Создаем бота с помощью команды.
Когда вы нашли и выбрали нужного бота, внизу диалогового окна нажимаете на кнопку «Запустить». Увидите окно, показанное на скриншоте.
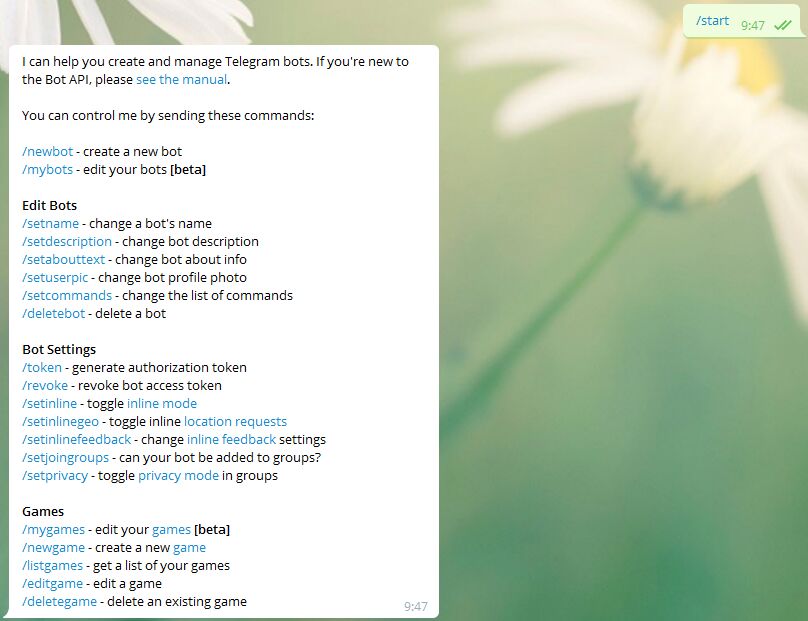
Из списка команд, которые понимает бот, выбираем самую верхнюю «/newbot».

Отлично. Теперь от вас требуется указать имя бота. Сделаете – увидите следующий результат.

Внимание! Не путайте имя с адресом!
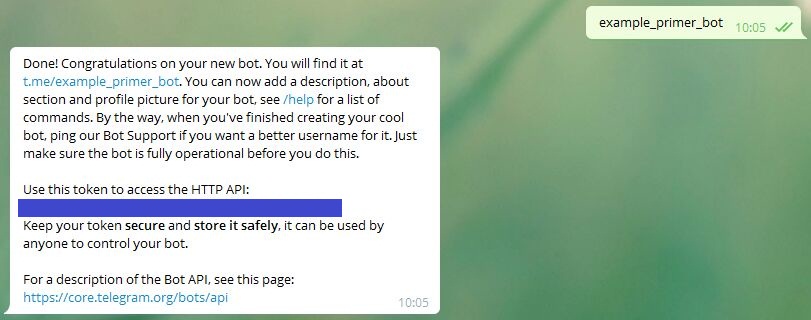
А вот теперь задаем адрес. Обратите внимание, что от вас требуется задать адрес в определенном формате – в конце должно быть слово «bot». Небольшой совет! Выбирайте адрес таким, чтобы его было легко запомнить.
Вы можете видеть, что напишет вам в ответ бот, когда вы укажите уже занятый и свободный адрес. В поле, которое залито синим цветом, находится ключ управления ботом.

Шаг 3. Настраиваем созданного бота.
Вернемся к первому сообщению. В нем показаны команды, которые позволят вам управлять настройками вашего бота и редактировать его.
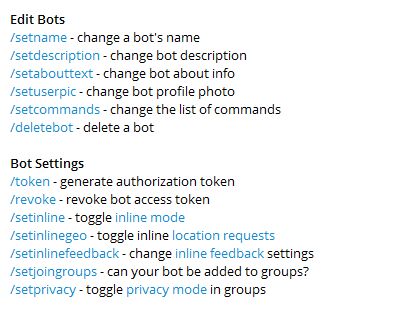
Чтобы вам было понятно, как это выглядит на практике, мы создадим описание бота, то есть «aboutinfo». Выбираем 3-ю команду в разделе «EditBots» и видим следующее.
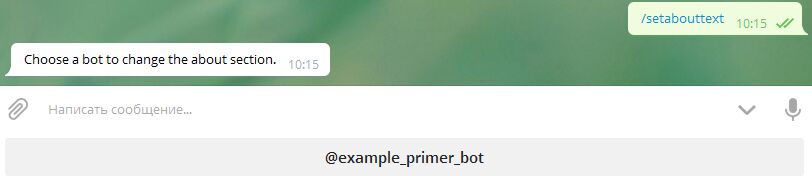
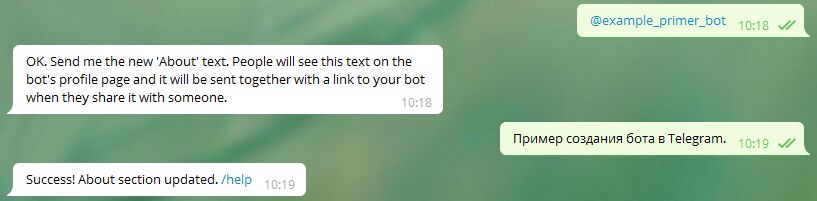
Выбираем бота. И нам предложено ввести описание. Делаем. Как видите, все получилось.
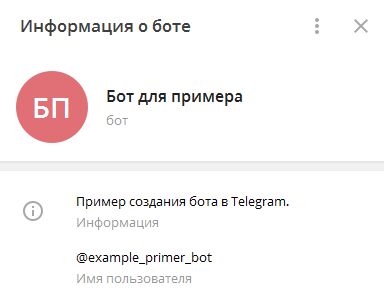
Можем убедиться, что изменения сохранены. Для этого открываем бота по ссылке http://t.me/example_primer_bot. В правом верхнем углу диалогового окна нажимаем на кнопочку в виде 3-х вертикально расположенных точек и выбираем пункт «Показать профиль». Результат показан на скриншоте. В поле «Информация» мы видим введенное описание.
Также можно изменять имя, аватарку, список команд и многое другое.
Шаг 4. Поручаем боту администрирование канала.
В списке контактов необходимо выбрать канал, который вы доверите в управление боту. Да-да, он уже должен быть создан. Делается это просто: выбираете в меню «Создать канал», задаете название и адрес. Кстати, можете ознакомиться с более детальной иллюстрированной инструкцией по созданию канала. Возможно, найдете там для себя что-то интересное.
Итак, выбрав канал, нажимаем на три вертикальные точечки в правом углу и выбираем пункт «Управление каналом». Видим вот такое меню.
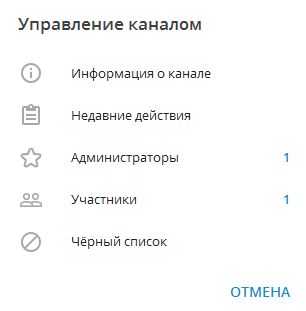
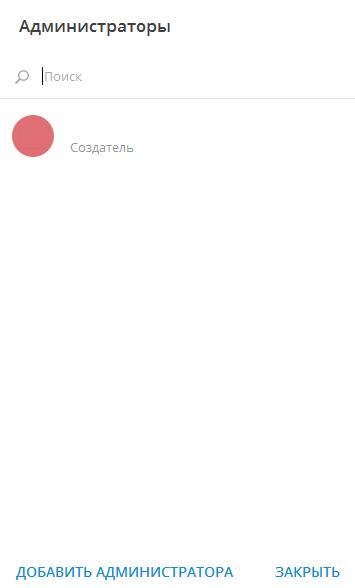
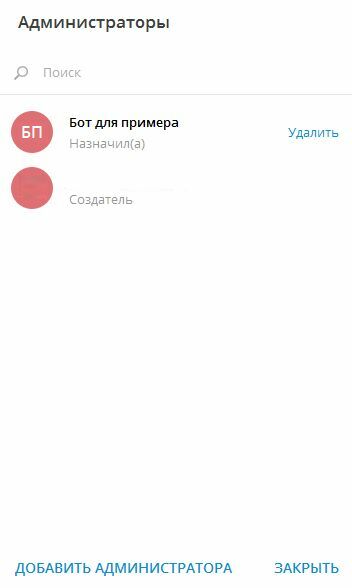
Нажимаем на пункт «Администраторы». И видим следующее. Кроме вас, как создателя канала, никого в списке администраторов нет.
Жмем на кнопку «Добавить администратора». Вводим адрес созданного бота. В нашем случае это «example_primer_bot».
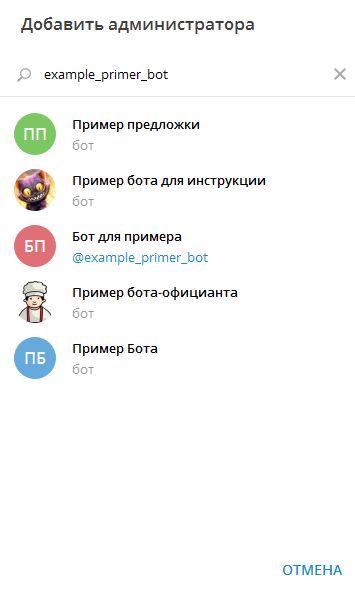
Как видите, результатов – несколько. Но нужный нам бот идет в списке под номером 3. Выбираем его. Видим вот такое предупреждение.
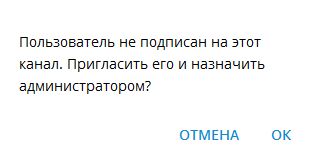
Конечно же, соглашаемся. И тут же можем указать возможности бота.
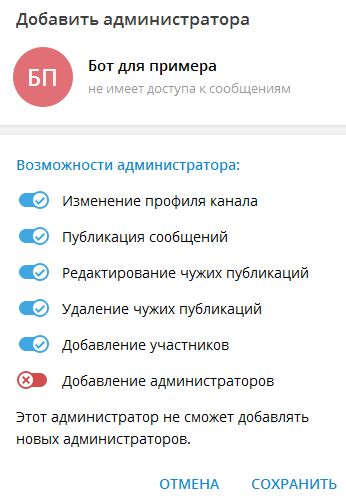
Нажимаем на кнопку «Сохранить». Прекрасно! Бот появился в списке администраторов. И рядом указано, кто его назначил.
Продолжение следует.